How to Recharge Air Conditioning Mazda 2
How to Recharge Air Conditioning Mazda 2 2012: Low refrigerant level due to leaks are most common A/C failures. Air conditioning system pressure switch will disconnect compressor if refrigerant levels are too low (or too high in case of overcharging).
Recharging is an easy task and usually it doesn’t take much effort or time (mostly). However, recharging will not fix the problem if you have a large leak on your A/C system.
Refrigerant will leak soon after and leak has to be pinpointed and repaired professionally. Anyways, not much too lose by charging A/C yourself since it doesn’t cost much.
Vehicle is a 2012 Mazda 2 with a 1.5L engine, procedure is the same for 2011 – 2014 models.
Safety First
– Recharge Air Conditioning on a cold engine.
– Engine will be running, stay clear from pulleys or belts.
– Refrigerant is poisonous, dont breathe it.
– Don’t wear lose clothes or other accessories.
– Wear gloves and protective glasses.
– Read instructions and safety warnings on refrigerant bottle.
– Use only Low Pressure Port to Recharge.
More details on How Air Conditioning Works by UTI institute.
Step 1: Buy an Air Conditioning Recharge Kit
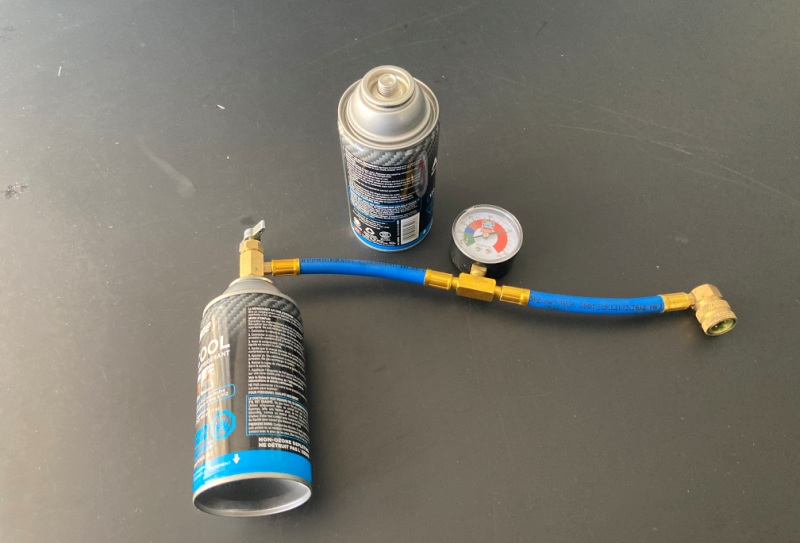
A/C recharging kits can be purchased on Amazon or at any local auto parts store. Price is about $40 depending on where you buy it. Recharging kits usually include two recharging bottles and a recharge hose with pressure gauge. Refrigerant Type is R134a.
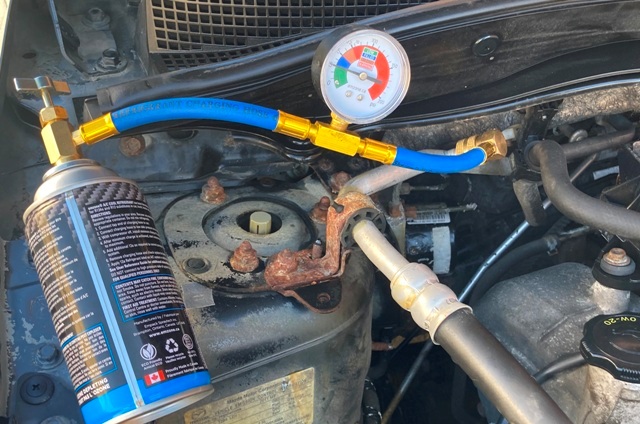
Step 2: Locate Recharging Port on Mazda 2
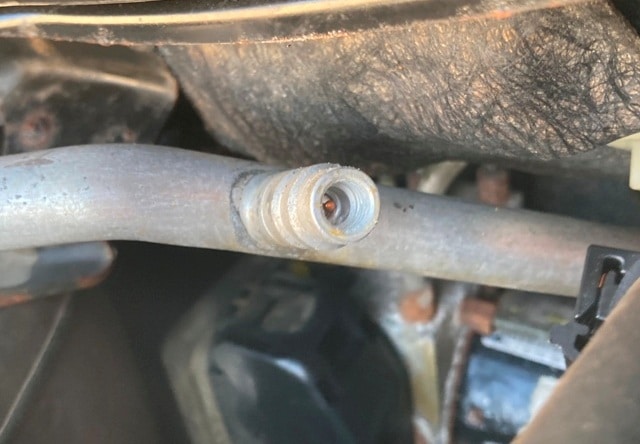
AC system has two ports, Low Pressure and High Pressure. Only Low Pressure Port can be used for recharging. Do not try to fit recharging connector on High Pressure Port. Generally, Low pressure and High pressure clearly labeled on protective caps, L for low and H for high.

Air Conditioning recharging low pressure port on Mazda 2 is located on right hand side of engine bay, close to strut mount and firewall. Its easy to work on, very accessible location.
Step 3: Prepare Recharging Kit
Open valve on air conditioning recharge kit fully. Insert and screw an refrigerant bottle, make sure its tight.
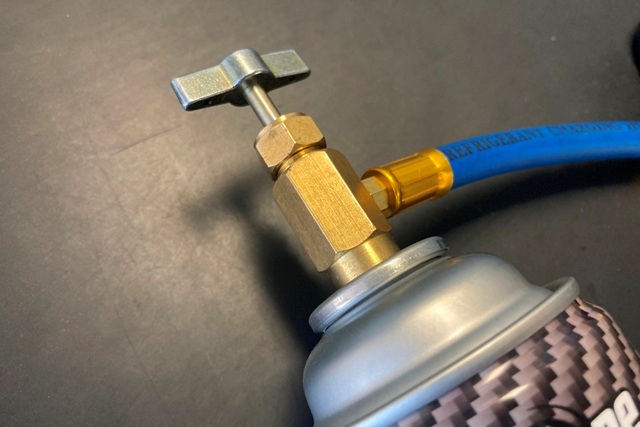
Close valve fully, valve has a pin and will puncture refrigerant bottle making ready for recharging. Refrigerant will not leak as long as valve stays closed.
Step 4: Connect AC connector on Low Pressure Port
Engine Off. As we previously said recharging low pressure port is located close to strut mount on passenger side. Recharging kit connector is lock in type, it has an outer ring which locks it in place.
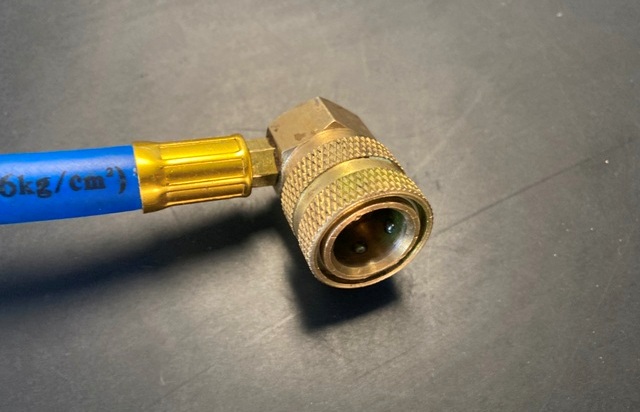
Remove recharging port protective cap,pull backwards locking ring on connector. Press recharging kit connector on low pressure port and release locking ring.

It now should be locked, pull on it to make sure is safely locked.
Step 5: Check AC System Pressure
Engine OFF. Check pressure on air conditioning system using recharging kit gauge. If gauge stays at zero, it means there is zero pressure on system and you might have a large leak. In this case, recharging might not help as it will very likely leak again soon after.
If pressure gauge is above zero and still shows some pressure on system then recharging should help and hold for long while.
Step 6: Recharging Air Conditioning Mazda 2 2012
Start engine and set Air Conditioning on max setting with air at full speed. Open valve on recharging kit and shake bottle. When pressure reaches above 20 psi or so, you will hear compressor engage. Keep recharging until pressure on gauge shows about 40psi (Do Not Recharge Past 40psi).
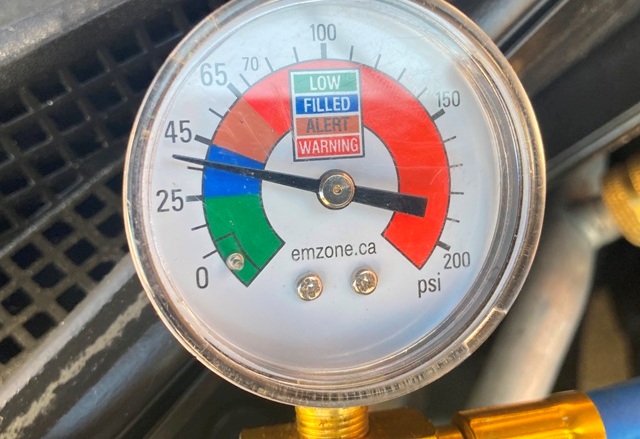
Check air vents, you should be able to feel cold air. As we said, keep recharging until you are close to 40psi. Check pressure Only when compressor is engaged and working. Do No Check pressure when compressor is Off, you will get a false reading. Do Not Overcharge, Stop at 40psi.
One bottler is generally more than enough, if you need more then stop engine, close recharging kit valve, remove connector from recharging port and replace bottle. Be careful as empty refrigerant bottle will still have some pressure and leak when removed from valve.
While recharging, make sure to check pressure periodically when compressor is engaged. When normal pressure is achieved (40psi) stop recharging.
Step 7: Disconnect Recharging Kit Hose
Stop engine, close valve and disconnect recharging kit hose from low pressure port when recharging is finished. Close valve first as refrigerant will leak if you disconnect it from recharging port with valve open.
If you hear any hissing noises then you have a large leak, refrigerant is leaking and you have to identify and repair the leak professionally.
Do Not Overcharge Air Conditioning System
Do Not Overcharge. Stop at 40 psi, overcharging will cause problem, including engine turning off due to high pressure on AC system. Also, damage to AC compressor and seals can occur if system is run with higher than normal refrigerant levels. Its prudent to check pressure frequently while recharging AC.
More details on How to Recharge Air Conditioning.
Comments: If you have any questions or suggestions related to this post or Used Car Toronto in general, don’t hesitate to use comment section below.