How to Change Chevrolet Sonic Thermostat Housing
How to change Chevrolet Sonic thermostat housing: Procedure to replace thermostat and/or thermostat housing is the same for 2011-2017 Chevrolet Cruze, 2012-2018 Chevrolet Sonic, 2013-2017 Chevrolet Trax and 2013-2017 Chevy Tracker, 1,8L Turbo engine.
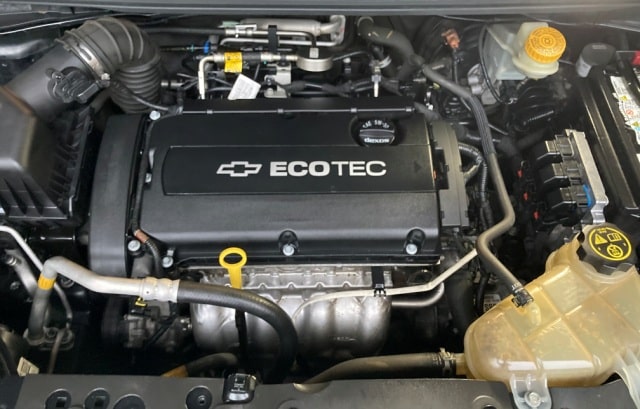
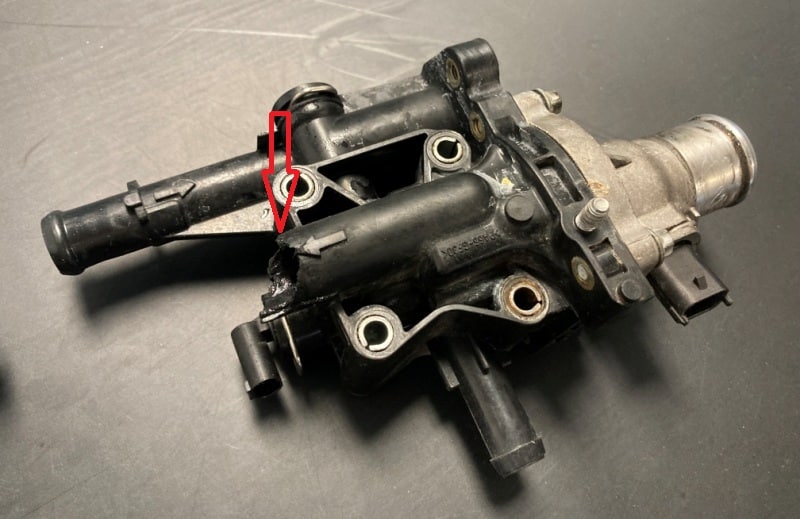
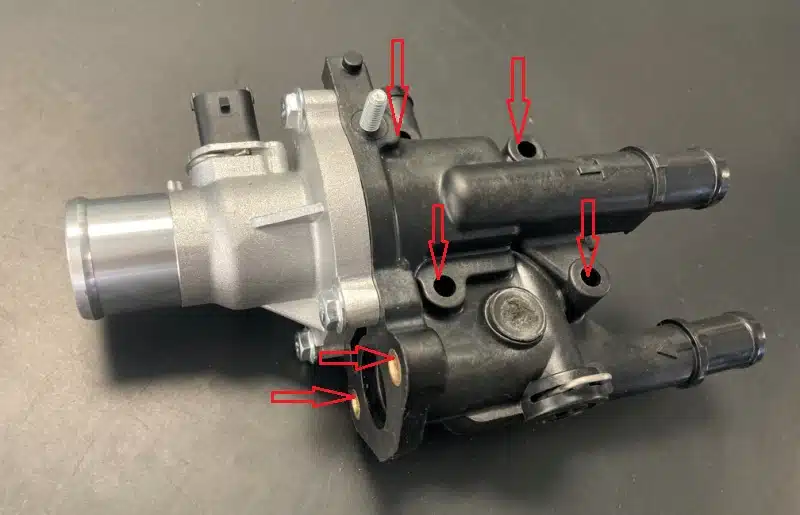
Chevrolet Sonic thermostat housing is located right side of engine when looking at it frontally (drivers side). Thermostat housing is not that hard but also not that easy to replace, a medium difficulty level. in any case, do not just change thermostat, you should replace the whole unit as an assembly (image below).
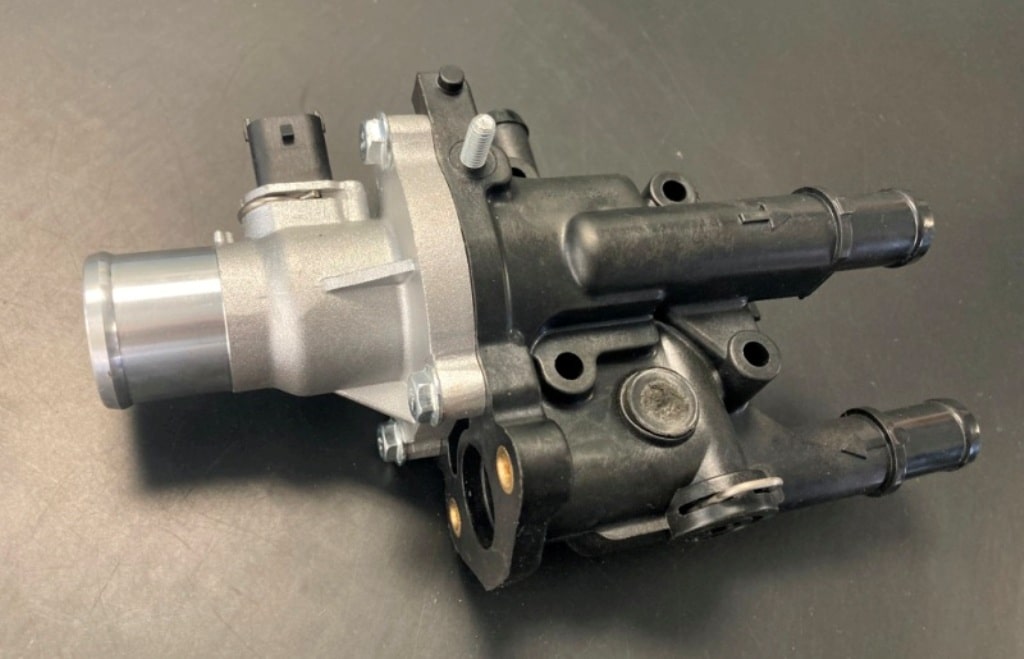
Thermostat housing assembly is not expensive, actually is quite cheap. It can be purchased on Amazon for about $70 or at any auto parts store. Reason for changing whole assembly instead of only thermostat is inlet and outlet coolant pipes are made of plastic and fail quite easily. Image below shows how one of coolant lines failed.
You can drain coolant using screw on bottom of radiator or you can replace thermostat housing without any preemptive draining, but you are going to have some coolant leak. Place a pan underneath the car to avoid a mess.
Tools
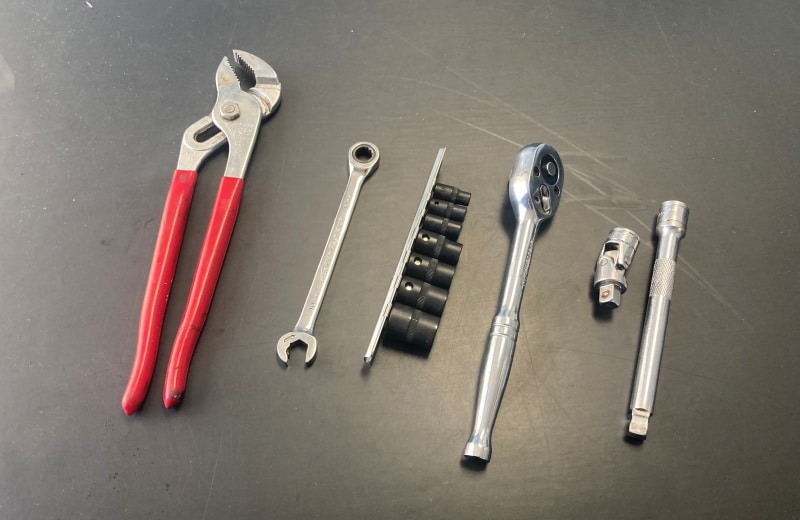
Automotive silicone (gasket maker), E-torx set (6 points), pliers, 10 mm wrench, flat screwdriver, 3/8 ratchet and short extension and a flexible extension (image below).
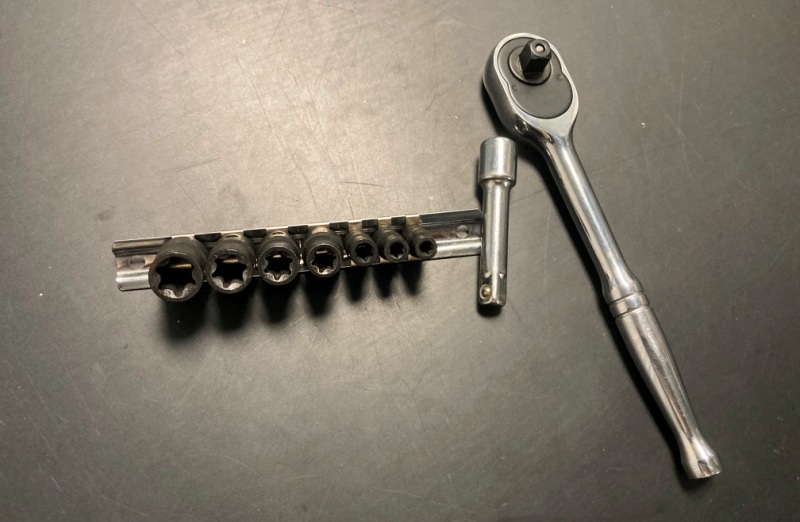
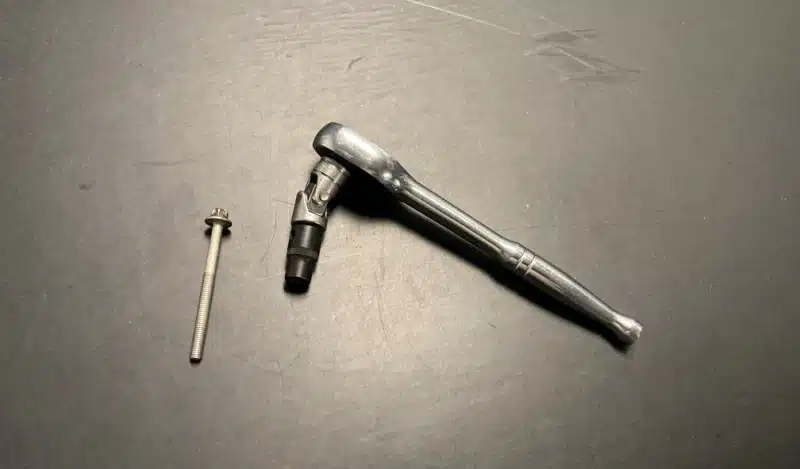
Also, you will need a shorter 3/8 extension for removing top thermostat assembly bolts (image below). However, you can use flexible extension instead if you dont have a short 3/8 extension.
How to Change Chevrolet Sonic Thermostat
Chevrolet Sonic Thermostat Assembly Removal
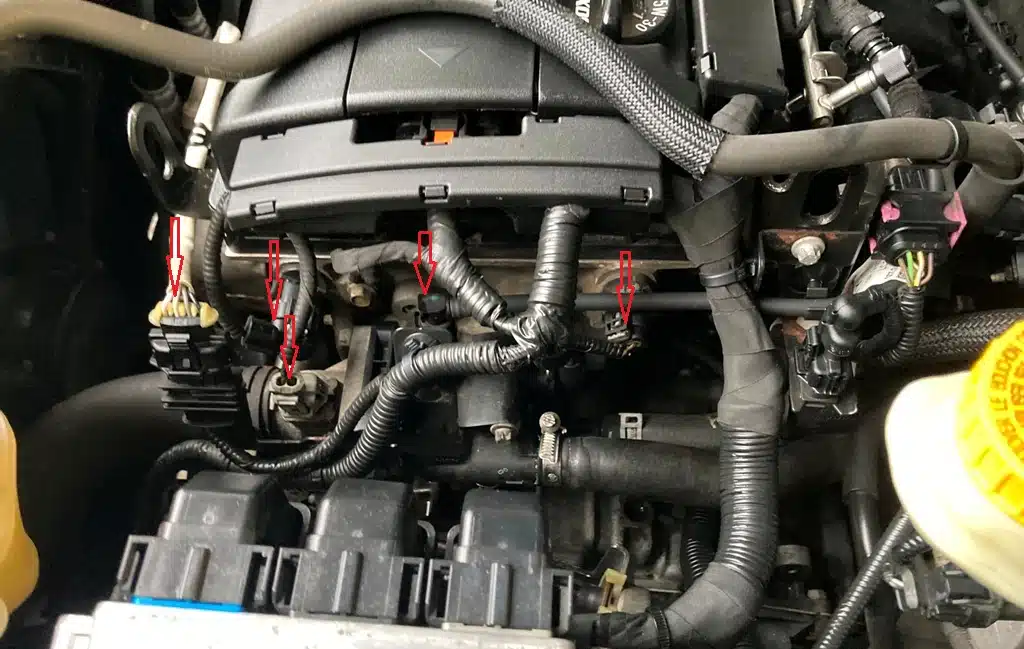
Start by unplugging all sensors on and around thermostat assembly (image below). Press on connector locking safety tab and pull on connector plugs to disconnect them.
Remove 10 mm bolt holding harness bracket and then disconnect wiring harness clips to separate wiring harness from bracket.
Push wiring aside to make space, as much as you can but it is enough to allow accessibility to thermostat assembly.
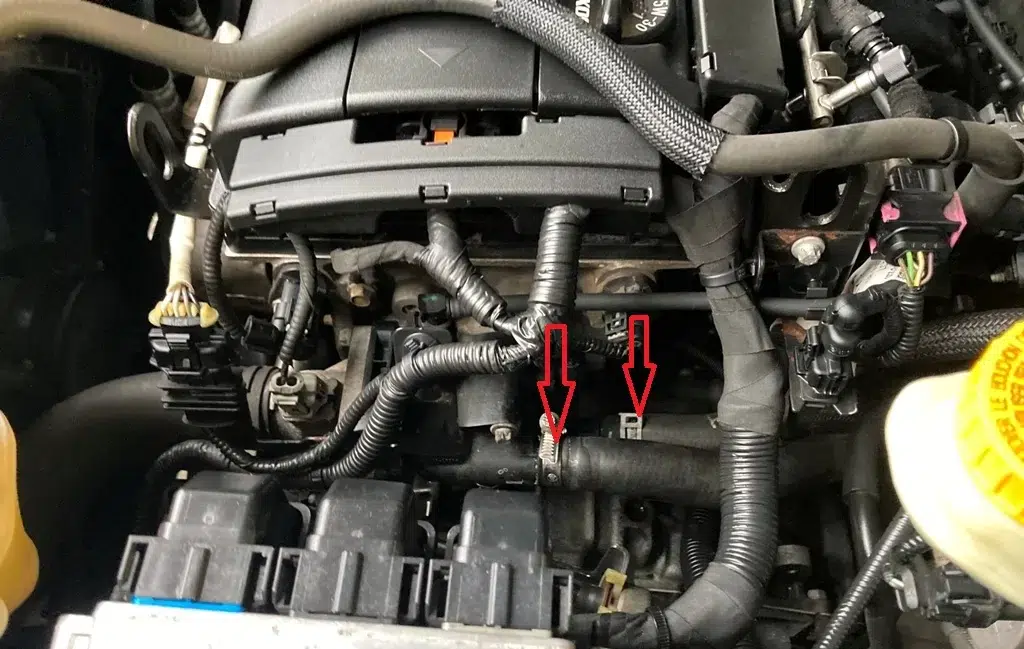
Disconnect inlet and outlet coolant lines (image below). Use pliers to remove clamps and disconnect rubber hoses from thermostat housing. Careful as you will get some coolant leaking.
Chevy Sonic Thermostat Assembly Bolts Location
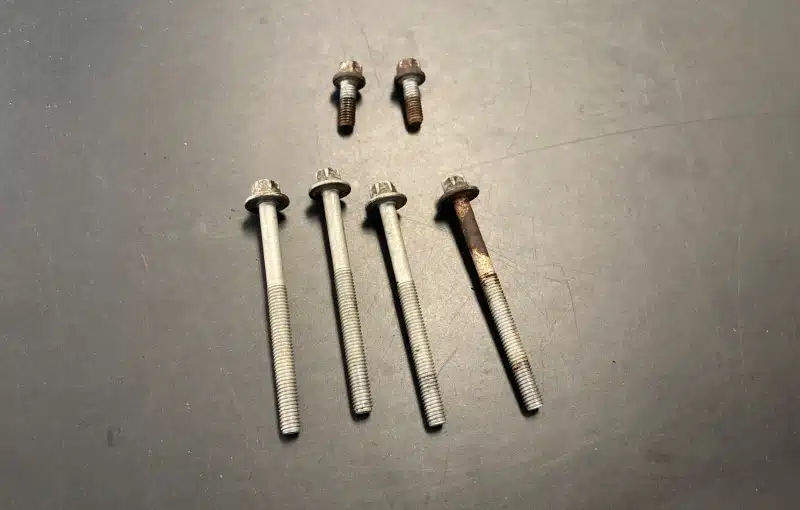
Chevrolet Cruze thermostat assembly is held in place with four E10 6 points torx bolts. Top two bolts are easy to access and remove, bottom bolts are a bit tricky but still easily removable too. On image below you can see location of thermostat housing bolts you need to remove.
Start by removing radiator hose, use plies to press clamp and pull it backwards, pull on radiator hose to disconnect it. Radiator hose most likely will be seized and will need some force to come out.
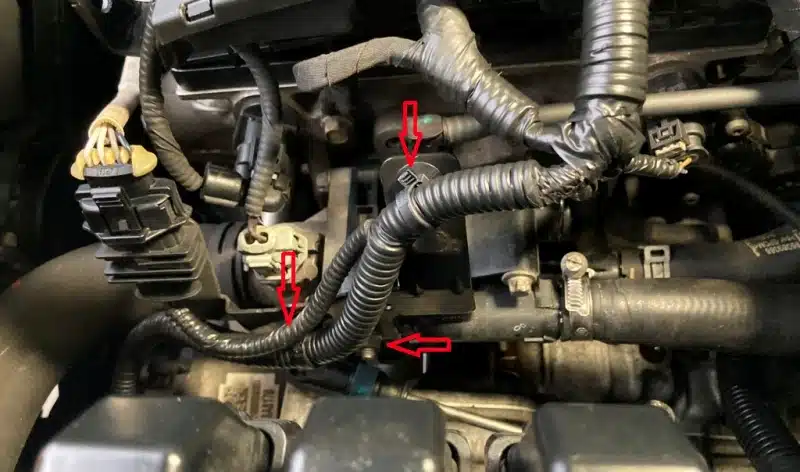
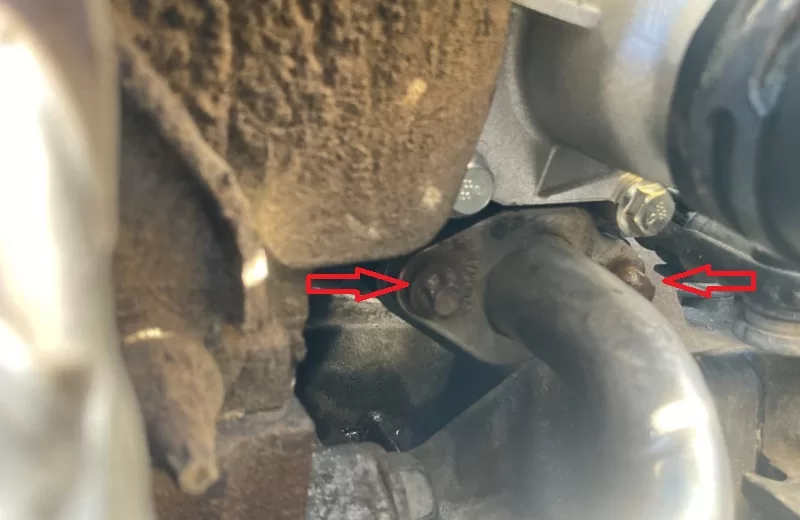
Image below shows Sonic thermostat assembly and bottom coolant line bolts which you need to remove.
Next, remove two E10 bolts holding lower coolant line in place which is located just underneath thermostat (image below). Use ratchet and E10 torx to remove bolts and disconnect coolant line from thermostat assembly. You can flip lower coolant tube out of way, do not pull on it, just slowly rotate it towards yourself.
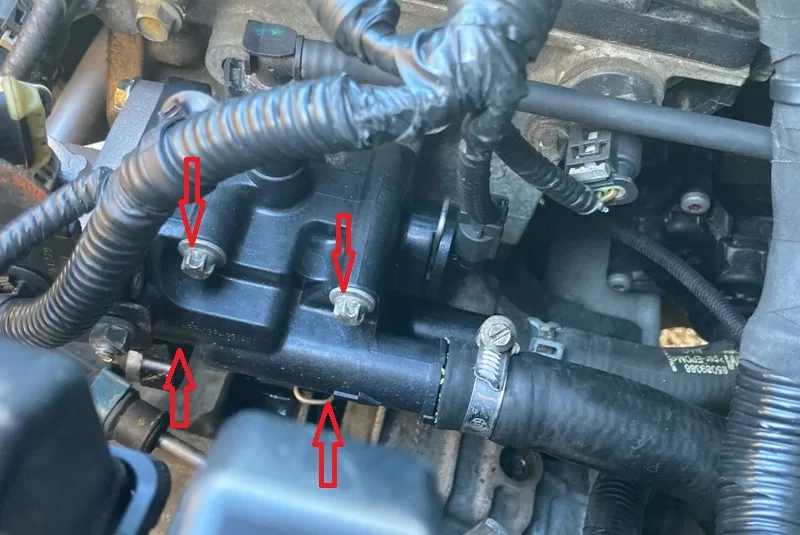
Thermostat housing assembly is held in place with four E10 torx bolts (image below). You can not see bottom two bolts but still are easy accessible.
Pull gear shift all the way to M, as gear lever is in the way. Having gear shit at M position will pull gear shift lever backwards creating enough space to remove bottom two bolts.
Start by removing bottom two bolts first, its easier to use a flexible extension (image below).
After thermostat housing bottom bolts are removed, proceed to remove top two bolts and pull thermostat housing out. Use a wire brush (soft) to clean engine thermostat housing opening before installing new thermostat assembly.
Chevrolet Sonic New Thermostat Assembly Installation
1- Place and align new thermostat assembly in place. Install all four E10 torx bolts and tighten them. Be careful as thermostat assembly is plastic and crack easily, do not over tighten bolts, just tight enough.
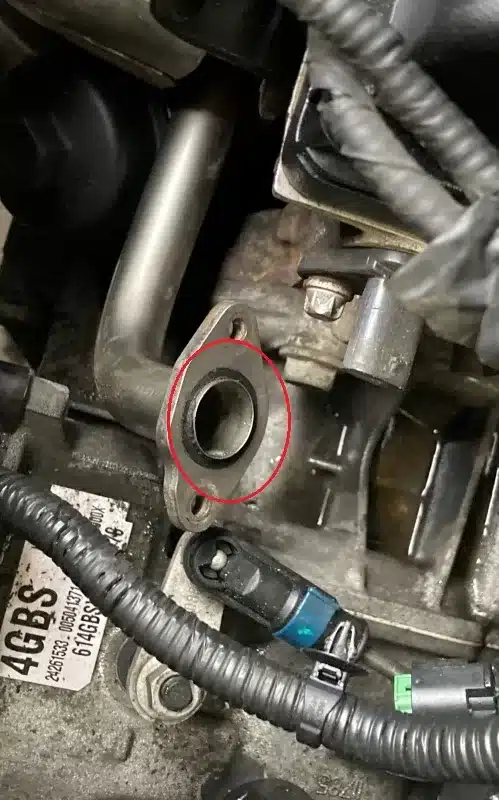
2- Use automotive silicone around lower coolant line opening (image below). Insert it in place and tighten two E10 torx bolts.
3- After thermostat assembly bolts are tightened install inlet and outlet coolant lines and clamps.
4-Install wiring harness bracket and tighten 10 mm bolt.
5- Plug in all sensor connectors, make sure to check you don’t forget any of them. Clip wiring harness to harness bracket.
Open radiator cap and fill it with 50/50 mix antifreeze until full mark. If you need to bleed the system, bleed or vent screw is located on top of radiator, passenger side. Open bleed screw and add coolant on expansion tank until coolant starts to flow from bleed screw. Close bleed screw.
Start engine and run it until normal temp is reached, keep revs at 2000 rpm. Once engine is fully warmed up, turn it Off and allow engine to cool down completely. Open expansion tank cap and add coolant until full mark.
Take the car for a test drive and make sure everything is running Ok and there are no coolant leaks.
Comments: If you have any questions or suggestions related to this post or Used Car Toronto in general, don’t hesitate to use comment section below.